One of the huge disadvantages of wakeskating compared to skateboarding is that you can’t just walk out your front door and practice on any street corner. You may see sweet rails or interesting obstacles you’d like to hit on a walk through downtown, but good luck hitting them on your wakeskate.
It is a sad truth of wakeskating that it is not the most convenient sport. It requires a body of water, a watercraft to pull you, and another person to operate that watercraft. Luckily there are cable parks!
The cable park is to wakeskating what the skate park is to skateboarding: it provides a place to hit obstacles and meet new people who also ride. On top of that, the cable is one of the best places to improve your game for several reasons. First off it’s there, running whenever you want to go ride. You don’t have to stop at the gas station and you don’t need anyone else to pull you.
Riding the cable is something you can do entirely independently. Secondly the cable runs at the same speed around the same obstacles endlessly. This means that you get to try new tricks repeatedly. And repetition is undeniably the best way to learn anything. In a sport that cannot boast of being the most convenient, the cable serves as a helpful solution. So here are some pointers to get you started at the cable.
Don’t Be Intimidated Sure there are always cable rats who spend every single day at the park. It may seem like everyone else there knows what they are doing. But here’s the thing: every one of them showed up at the cable for the very first time just as intimidated and clueless as any beginner would be.
We all have to start somewhere. Don’t get the impression that everyone is watching you. Everyone else is too busy concentrating on their own riding to notice a mistake made by a newcomer. A lot of cable parks have several cables, one for beginners and another more advanced one. Don’t be too proud to start on the slower cable. You can always move over to the more advanced cable once you get more comfortable.
At&t Basic Cable Channels
The Cable Operator Is Your Friend Talk to the cable operators, ask them for advice – it’s what they are there for! Cable parks hire operators who are social, outgoing and like to teach. They are paid to sit and run the cable. So they are free to watch you and are knowledgeable on how to fix your mistakes. I asked my local friendly cable operator, Sascha Peschi, how he felt about people asking for advice and this is what he told me: “ I’m not psychic.
I can’t tell if it’s your first time. I can’t tell if you’re struggling. If you need help, just ask!
It’s what I’m here for. I’m not just a monkey pushing buttons!” So there you have it. Getting Up Getting up at the cable is a lot like dock starting so if you have ever tried to dock start, you should have a good idea of what it’s like. Sit with your feet on the board, keeping the board out in front of you. Keep your knees bent and the handle in towards your lead hip (You’ll hear me say this A LOT because keeping your knees bent and the handle in are important for everything you do on the cable). Don’t worry about trying to stand up. Let the cable do the work and pull you up.
Noire promotional codes L.A. Keygen generator software.
If you try to stand up on your own rather than letting the cable pull you up, you’re probably just going to face-plant in front of the start dock. Which isn’t a huge deal. Lots of people fall trying to get up their first time. According to Sascha, even on a slow day at least a dozen people fall getting up. So if you do fall just swim in and get back in line.
As the saying goes: If you fall of your horse.etc, etc. Taking the Corners Going around the corners is one of the trickier aspects of riding the cable. Here’s how you do it: Edge out in between the buoys (those buoys are there for a reason!) Keep your eye on the cable and watch to see when the cable pulling you makes the turn around the corner. Just before the cable makes the turn, turn your board in the direction you are going to go. Once again, make sure to keep the handle in and your knees bent!
Hitting Obstacles Almost all cables have a box and in my opinion, this is the best slider to begin with on a wakeskate. However hitting any slider involves the same basics. Start under the cable and take a direct edge to whatever obstacle you are going to hit. Just before you hit it, flatten off. KEEP THE HANDLE IN AND YOUR KNEES BENT. If you come off of the slider early, away from the cable, you probably edged too hard. If you come off towards the cable, you probably edged too soon or possibly cut back in before you hit the slider so you need to wait a little longer to take a direct edge out.
If you want to try to hit some kickers edge the same as you would towards any obstacle. When you reach the top of the kicker suck your knees up otherwise you will lose your board. Then make sure to bend your knees and absorb the landing. Have Fun Remember the best thing about the cable is that you aren’t relying on anyone else or taking up anybody else’s time by riding. It’s just you out there so enjoy it!
Don’t put too much pressure on yourself right off the bat. It’s better to start with the basics and as you get more comfortable you can try more complicated maneuvers like frontboards, backlips, spinning, and doing tricks onto and off of the sliders. If you run out of ideas for things to try, watch others for inspiration. Don’t be intimidated get out there, and have fun! Here's a list of the cable's here in the US of A. If you live in the rest of the world, you have options.
— Deerfield Beach, FL — Orlando, Florida –- New Braunfels, Texas –– Kansas City, Kansas — Tampa, Florida –- Ft. Myers, Florida –- Cincinnati, Ohio (under construction) — Santee (San Diego area), California (proposed).
With so much attention these days focused on the latest and greatest gear Like for instance or It’s easy to neglect some of the less-glamorous aspects of the studio Like cables, for instance. Because once it’s all connected, and working as it should You forget they even exist. And that’s how it should be. However Getting to that point requires A LOT more knowledge than some might imagine.
Midi Cable Basics
Which is why, in today’s post entitled: The Ultimate Guide to Audio Cables for Home Recording I’ve compiled an in-depth look at all the must-know facts of this important subject. If you don’t know your cables yet, by the end of this post you will. Let’s begin Analog vs Digital Signals The first question every beginner asks is: What’s the difference between analog and digital cables? In short. Analog cables work by transmitting information through stream of electricity, and. Digital cables work by transmitting information through a long string of 1’s and 0’s ( aka binary code). For a detailed explanation on digital audio,.
For now though, let’s focus on analog. Up next The Basics of Analog Cables In the recording studio, there are 2 types of analog cables:. Balanced. Unbalanced that we use to transfer 3 levels of audio signal:. Mic Level – ( balanced).

Instrument Level – ( UNbalanced). Line Level – ( balanced) Line level is the standard signal strength used with all pro audio equipment.
Which is why mic/instrument level signals are first boosted to line level before entering the signal chain. Instrument level signals, which come from electric guitar/bass, are sent through a standard guitar cable, which is then boosted to line level using a direct box. Mic level signals, which come from your mics, are sent though a standard microphone cable, which is then boosted to line level using a mic preamp. For more info on microphone cables in general, check out this post:. Up next Balanced vs. Unbalanced Cables The next most common question beginners ask is: What’s the difference between balanced and unbalanced cables? In terms of performance: Balanced cables are relatively immune to noise from interference such as radio frequencies, electronic equipment, etc.
Which is why they’re the standard for pro audio. In terms of design: BALANCED cables have 3 wires:.
Signal (+). Signal (-). Ground While UNBALANCED cables have only 2:. Signal.
Electrical Cable Basics
Ground The addition of the 3rd wire in a balanced cable is exactly what makes noise-cancellation possible. Later in this post, I’ll explain how it works. For now though, let’s continue with the basics.
Up next Analog Connectors Explained On either end of a balanced analog cable, you will find 1 of 3 connectors:. XLR Male – which connects to various hardware inputs. XLR Female – which connects to the microphone, and various hardware outputs. TRS – which connects to both inputs AND outputs.
Each of these connectors has 3 contact points which carry signals from the positive, negative, and ground wires previously mentioned. XLR male has 3 pins.
XLR female has 3 holes. TRS has 3 surfaces known as Tip, Ring, and Sleeve Unbalanced analog cables typically only use one connector, which is the TS connectors commonly seen on instrument/guitar cables. Up next TRS vs TS Connectors The third common question folks ask is: What’s the difference between TRS and TS connectors? As you can see in the picture, TRS connectors have 3 contact points, while TS connectors have only 2. The extra 3rd contact point on a TRS connector is what allows it to carry a balanced signal. The balanced wiring for TRS goes:.
Tip = Positive. Ring = Negative. Sleeve = Ground While the unbalanced wiring for TS goes:. Tip = Positive. Sleeve = Ground Up next How Balanced Cables Cancel Noise Earlier I promised show you exactly how this works. So here’s the explanation: When audio enters a balanced cable Both the (+) and (-) wires receive identical versions of the signal The only difference is, polarity of the (-) wire is INVERTED.
As the two signals travel along the cable, BOTH wires gather noise, the same way unbalanced cables do, however Before re-combining them at the opposite end of the cable, the polarity of the negative wire is flipped BACK, to once again match the positive signal. With the noise patterns now on OPPOSITE polarities, they cancel each other out, leaving the original signal noise-free. Simply brilliant. Up next Converting Signals from Unbalanced to Balanced By now, you’re probably wondering: If unbalanced cables are noisier, why use them at all?
Well the answer is Due to the design of electric guitars and other instruments, it’s not always possible to start off with a balanced signal. But what you CAN do is convert them, as necessary.
For example, because guitar cables get too noisy beyond 20-25 ft A direct box ( aka DI, aka direct injection) is commonly used to change the unbalanced guitar signal into a balanced mic signal Which can then be extended for several-hundred-feet, through a standard XLR mic cable. Up next Balanced MONO vs Unbalanced STEREO People often get confused, the first time they notice That the TRS connectors used on balanced cables Are the same connectors as those found on their. And they wonder: How can that be, when one is mono, and the other is stereo? The answer is: STEREO headphone cables are UNblanced. So unlike balanced MONO wiring, which has a (+), (-), and ground Stereo headphone wiring looks like this:.
Tip = Left Channel. Ring = Right Channel. Sleeve = Ground Got it? Now that we’ve got analog cables covered, let’s move on to the second half of this post Where we talk about DIGITAL Cables The good news about digital cables is, unlike analog cables, you don’t really need to understand much about how they work, in order to use them. The bad news is, there’s A LOT more of them, and the current ones are constantly being replaced as newer technologies develop. As of 2018 though, here are the ones you should know: 1. The Three Interface Cables The one digital cable that every studio MUST have is The one that connects your to your computer.
And undoubtedly, it’s one of these 3:. USB– the standard for budget interfaces, it has the slowest data transfer of the 3, but still works well enough for home studios. Firewire– typically seen on pricier interfaces, it offers significantly faster speeds than USB. Thunderbolt– only seen on newer high-end interfaces, it offers unprecedented data transfer rates, previously only seen on dedicated PCIe processing cards. Soon we may also see interfaces with USB 3.0, which rivals the performance of current thunderbolts. MIDI Cables Commonly used by electronic musicians MIDI cables transfer data between various electronic instruments and related digital devices Using a language known as MIDI ( Musical Instrument Digital Interface) Which communicates various types of musical information, including notes and velocity.
In home studios, these cables usually run from keyboard/MIDI controller to a MIDI interface, which connects to your computer, and lets you control the virtual instruments within your. These days, MIDI cables aren’t nearly as common, as USB cables have now made it possible to transfer MIDI data directly to the computer. Optical Cables By transferring information using a series of light flashes Optical cables (aka lightpipe cables), can carry multiple channels of digital audio through a single cable. The 2 signals it accepts are:.
ADAT– which carries 8 channels at 48kHz, or 4 channels at 96kHz. S/PDIF (aka TOSLINK)– which carries 2 channels of audio In the studio, ADAT is commonly used to send all 8 channels of a multi-channel mic preamp to the audio interface. S/PDIF is commonly used to output your stereo mix from the audio interface to an external source such as a cheaper pair of monitor speakers.
BNC Cables Identical to the coaxial cables used to connect your cable TV But with a different name and purpose BNC cables are used in the studio to sync the internal clocks of multiple digital devices, whenever two or more are connected. Without them, the digital devices cannot sync properly, resulting in mis-aligned samples, and annoying clicks and pops in the audio. While simple studios rarely use BNC cables, larger studios with advanced signal routing often require them. AES/EBU Cables The strangest of all studio cables AES/EBU cables use the XLR connectors of an analog mic cable To transmit the S/PDIF signal of a digital optical cable. While not common with budget recording gear, they’re often used on higher-end interfaces and other hardware. One fact that few people know is The term “ AES/EBU” is actually an audio signal (NOT cable), that can work with several different connectors including:.
Optical. BNC. RCA. XLR It’s only because the XLR versions are most popular, that we associate them with the name.
As you might imagine, they can be easily mistaken for mic cablesso if you use them, be sure to label them. Cat5e Cables The same cables as those used with home telephones Cat5e cables work great in the studio as well Because of their ability to send BOTH a power source, and multiple channels of digital audio, through a single line. As well astheir ability to stretch LONG DISTANCES with extremely LOW LATENCY TIMES. This combination of features makes them perfectly suited to meet the needs of many high-end headphone distribution systems.
And some of the most advanced systems can send up to 40 channels of audio to a personal mixer, with just a single cat5e cable! Up next Power Cables Now that we’ve covered both analog, and digital cables All that remains is: power cables. The great thing about pro audio is, you use the same one for almost everything. Known as the IEC C13 (or IEC for short), this one cable is used on virtually everything from computers, to studio monitors, to studio rackmount setups. Over time, studio collect tons of them, so if you ever lose one, chances are good you’ll have a few back-ups. Up next Cable Organization Now that we’re nearing the end, the final topic I’d like to cover is organization.
It’s not hard to imagine that for most studios, cable organization is a constant struggle. So to conclude this post, here are 3 tips which help make it easier: 1. Use Snake Cables If too many cables is your main problem A can offer the perfect solution By essentially combining many individual cables into ONE. For home studios, this has 2 benefits: First, it allows you to dramatically reduce the clutter behind your rack, so you can actually make changes without untangling a spider-web of cables. Second, it allows you to relocate the inputs of your mic preamp to literally anywhere in the roomwhich gives you one less reason to dig behind your rack. To learn more about snake cables, check out this article:.
Up next 2. Use Cable Winders While pro studios might laugh at the idea of using cable winders In a typical bedroom studio, where each day you roll up your ONE guitar cable, and ONE mic cable Cable winders can make this tedious job a lot less painful. To extend it, simply pull it out to the exact length needed and it locks itself in place. To retract it, just firmly tug at the base, and it rolls itself up, automatically. While some folks call them gimmickythere are many others (myself included) who absolutely love them. For home studios, these are the 3 I recommend:.
And for the final tip 3. Solder Your Own Cables In pro studios, you rarely see exposed cables anywhere.
The reason is By cutting and soldering their own cables, they can tailor each one to the exact perfect length for the job. In home studios on the other hand, it’s not uncommon to see a 25 ft cable used on a 3 ft connection.
Think soldering is too hard? Well I can tell you from experience, it’s not nearly as challenging as many people assume.
With a few basic tools and some practice, virtually anyone can do it. So if you’re interested Here’s a good video I found which explains how it’s done: And here’s a checklist of the essential items covered:.
Tools:. a pair of pliers with a wire cutter. a soldering iron. a roll of solder. Parts:.
a roll of balanced cable. XLR male and female connectors.
TRS connectors It’s not a job I recommend for everyone, but handyman-types can easily learn this technique with just a few hours practice. And as an awesome side benefit All those old cables and connectors you no longer use can be scrapped for parts and re-purposed over-and over again, to follow the ever-changing needs of your studio. Primary Sidebar.
The last thing I feel the need to educate you on is irregular code formats. I added the first line of the code - (AE8A-D4FA) and saved it. 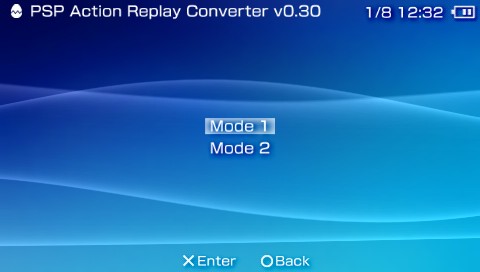 Check both of the boxes to make sure you have both lines enabled and that's all there is to it! Then I added the second line of the code (AE8D-0D9A) and saved it separately on the list.
